How to Control a Mini Excavator Joystick for Smooth Grading?

Time:2026-10-08 Author:Isabella
0%

How to control a mini excavator joystick for smooth grading is a practical skill built through small, repeatable movements. The blade should skim the surface, not chase every uneven patch. A steady engine speed, relaxed wrist, and clear sightline help prevent sudden overcorrection. It sounds simple. It is not.

The Association of Equipment Manufacturers’ 2024 construction outlook emphasizes operator productivity, equipment utilization, and the growing value of precision technology. EquipmentWatch’s annual market reporting also shows why compact equipment remains important for smaller contractors: machines must deliver predictable results in tight work areas. These reports do not replace field judgment. They reinforce it. A laser level, grade checker, or machine-control display can confirm progress, but the joystick still controls the final feel.

Mini-excavator trainer Mike Vance explains the principle clearly: “Smooth grading comes from moving the controls slowly enough to let the machine respond.” That advice matches common manufacturer training guidance from Caterpillar, Kubota, and Takeuchi. Roll the joystick gently, avoid abrupt neutral movements, and use short passes when trimming finished grade. Keep the attachment close to the work, but maintain a safe view of people, utilities, and edges. OSHA continues to identify struck-by and equipment-related hazards as serious construction risks.

This guide examines how to control a mini excavator joystick for smooth grading, from thumb pressure to boom, arm, and bucket coordination. It also admits a common weakness: operators often focus on speed before accuracy. Better results usually begin slower. Then confidence grows.
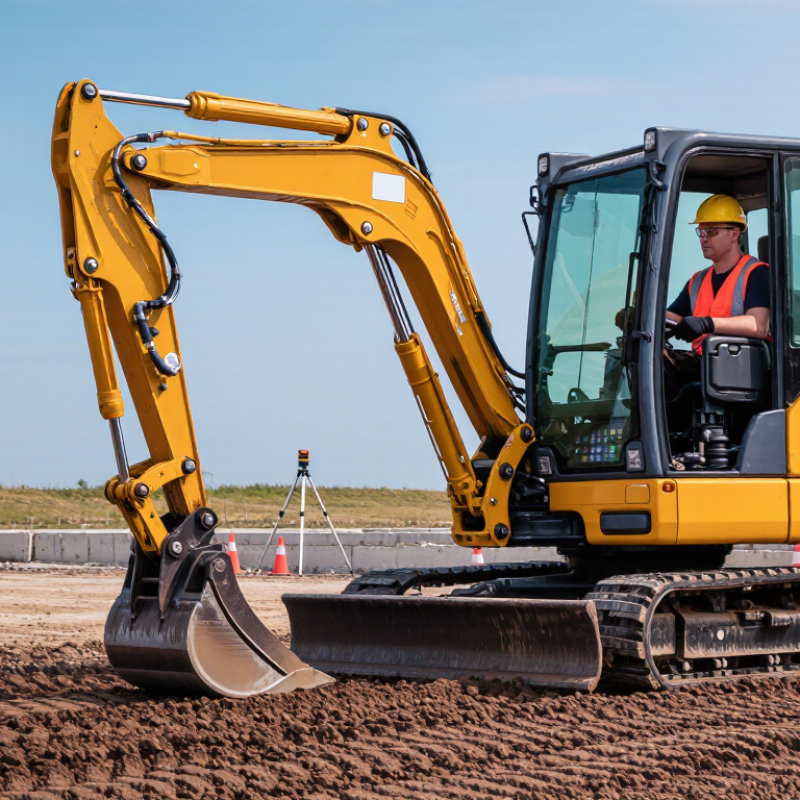
How to Control a Mini Excavator Joystick for Smooth Grading?

Understanding Mini Excavator Joystick Functions for Grading

Smooth grading begins with understanding what each joystick actually commands.

On many mini excavators, the left joystick controls swing and arm movement. The right joystick usually controls boom and bucket movement.

Control patterns can differ, so check the cab diagram before operating.

Do not assume.

For grading, move the bucket with small, steady inputs rather than sudden wrist movements. Pull the right joystick gently to raise the boom. Push it forward to lower the boom. Curling or opening the bucket depends on the joystick’s side-to-side movement.

The left joystick adjusts reach and swing, helping place the bucket along a controlled path. Keep both hands relaxed. Tight grips often create jerky corrections.

Set the bucket teeth slightly above the finished surface, then feather the controls while traveling slowly. A light bucket curl can shave high spots, while small boom adjustments maintain depth.

Watch the bucket edge, not only the control levers. On firm soil, pressure changes appear quickly. On loose fill, the bucket may sink unexpectedly.

I still find that slower movements produce better results than constant corrections. That is not always easy.

Experienced operators also test the controls in an open area, confirm hydraulic response, and keep bystanders outside the working radius. If the surface develops waves, pause, reposition the machine, and reduce joystick travel before continuing.

Setting Up the Excavator and Work Area for Smooth Control

How to Control a Mini Excavator Joystick for Smooth Grading?

Setting Up the Excavator and Work Area for Smooth Control

Smooth joystick work begins before the engine starts. Park on firm, level ground, away from loose edges and standing water. The U.S. Bureau of Labor Statistics recorded 1,075 fatal work injuries in construction during 2023. That figure reinforces a simple point: site preparation is part of machine control.

Walk the full working area. Remove rocks, scrap, and hidden hoses. Mark underground utilities and confirm the digging limits with the site supervisor. Keep bystanders outside the swing radius. The Health and Safety Executive identifies workplace transport as a major source of serious incidents, so a clear exclusion zone matters.

Set the tracks parallel to the grading line. Lower the blade until it gives steady support, but do not force it into soft soil. Check hydraulic controls, alarms, mirrors, and the seat position. I prefer a slow, dry joystick test before moving soil. It feels unnecessary. It is not.

Use low engine speed while learning the soil response. Move the boom, arm, and bucket with small inputs. Watch the cutting edge, not only the display. Keep both hands relaxed. Jerky control often begins with poor posture or an uneven track base. ISO 20474 guidance emphasizes safe operation and stability for earth-moving machinery. My own setup is not always perfect, so I stop and reset when the machine starts drifting.

How to Control a Mini Excavator Joystick for Smooth Grading?

Setting Up the Excavator and Work Area for Smooth Control

Proper setup reduces unnecessary joystick corrections and helps the operator maintain a consistent grading depth. The chart compares common work-area preparations by their typical effect on grading deviation, measured in centimeters. Lower values indicate smoother and more accurate grading.

Practical guidance: Level the machine, keep the blade firmly supported, remove large obstacles, establish a clear reference line, and use small, steady joystick movements. These steps improve bucket control and reduce over-correction during finishing work.

Using Coordinated Joystick Movements to Shape the Ground

How to Control a Mini Excavator Joystick for Smooth Grading?

Smooth grading depends on coordinated joystick movements, not aggressive pulling. Before moving, confirm the control pattern and check the attachment response. In the common ISO pattern, the left joystick controls swing and arm movement. The right joystick controls boom and bucket movement. Move the boom down gently while extending the arm. Feather the bucket at the same time. Keep the cutting edge nearly level with the soil. Small inputs matter.

A useful rhythm is boom, arm, then bucket correction. Do not push every function fully at once. That creates waves in the surface and increases hydraulic load.

The U.S. Occupational Safety and Health Administration recorded 1,069 construction fatalities in 2023. Its data reinforces the need for controlled movement, clear visibility, and safe working distances. Grading near people or hidden utilities requires extra planning. Professional skill includes knowing when to stop.

Tips: Keep the bucket light. Use the blade as a visual reference. Watch the ground beside the machine, not only the bucket. For a final pass, reduce joystick travel and maintain steady engine speed.

I used to chase small ridges with quick corrections. That often made the surface worse. Now, I pause, reposition, and make one shallow pass.

ISO 6015:2018 also emphasizes stable operating conditions and controlled excavator performance during testing. Field conditions are less perfect, though. Wet clay, loose gravel, and uneven tracks can change the response quickly. Expect small mistakes, then adjust slowly.

Maintaining a Consistent Bucket Angle and Cutting Depth

How to Control a Mini Excavator Joystick for Smooth Grading?

Maintaining a Consistent Bucket Angle and Cutting Depth

Smooth grading begins with a steady bucket angle, not fast joystick movement. Keep your wrist relaxed and move the boom, arm, and bucket controls in small, blended inputs. Set the bucket teeth just below the target surface, then feather the joystick while traveling slowly across the work area. Watch the bucket’s cutting edge, not only the soil pile. A small angle change can remove several centimeters of material.

Experienced operators often make a shallow test pass first. Stop, check the surface with a straightedge or laser level, and adjust the next pass. Maintain similar engine speed and travel speed throughout the cut. Uneven speed creates waves, even when the bucket angle looks correct. Keep the attachment close to the machine when repositioning. It improves stability and reduces unnecessary swing.

The U.S. Bureau of Labor Statistics reported 1,075 fatal construction workplace injuries in its 2023 Census of Fatal Occupational Injuries. That figure does not measure grading quality, but it reinforces the need for controlled movements and clear surroundings. Never rely only on the joystick feel. Soil changes, worn pins, and operator fatigue can distort depth judgment. I still find that my first pass is often imperfect. Rechecking the grade is not wasted time; it exposes small errors before they spread across the entire pad. Source: U.S. Bureau of Labor Statistics, Census of Fatal Occupational Injuries, 2023.

Checking Grade Accuracy and Refining the Finished Surface

After rough grading, stop relying on the joystick alone. Park on stable ground and check the surface with a calibrated laser level or grade rod. Check the corners. Then measure the center and transitions between passes. These points often reveal shallow dips that look flat from the cab.

Compare each reading with the project tolerance, not just your visual judgment. A two-centimeter error may matter on a drainage path, especially when water stands after rain. Mark low areas with paint or small stakes. Adjust the bucket angle slowly, using short joystick movements and light passes. Keep the tracks aligned with the finished direction when possible. This reduces ridges and uneven compaction.

I usually make one final pass with the bucket slightly curled, but this is not always best. Loose soil can roll ahead of the cutting edge and create a false finish. I still miss small high spots when the light is poor. Side lighting helps expose them. Recheck the grade after every correction, especially near edges and utility crossings. A smooth appearance is useful, but measured accuracy is more dependable. Remove loose clumps by feathering the bucket, then walk the area carefully before releasing it for the next trade.

FAQS

What does each joystick usually control on a mini excavator?

The left joystick usually controls swing and arm movement. The right joystick usually controls boom and bucket movement. Control patterns can differ. Check the cab diagram first.

How should I move the joystick during grading?

Use small, steady inputs. Pull the right joystick gently to raise the boom. Push it forward to lower the boom. Avoid sudden wrist movements. They create jerky corrections.

How can I keep the bucket at a consistent depth?

Set the bucket teeth slightly below the target surface. Feather the controls while traveling slowly. Use small boom adjustments to maintain depth. Watch the cutting edge closely.

What bucket angle works well for removing high spots?

A light bucket curl can shave high spots. Keep the bucket angle steady across the pass. A small angle change can remove several centimeters. Check the surface after each shallow pass.

How should I prepare the work area before grading?

Park on firm, level ground. Remove rocks, scrap, and hidden hoses. Mark underground utilities before work begins. Keep people outside the swing radius. Clear space matters.

How do soil conditions affect joystick control?

Firm soil responds quickly to pressure changes. Loose fill can make the bucket sink unexpectedly. Reduce joystick travel when the ground feels soft. Stop if the machine begins drifting.

What should I do if the finished surface develops waves?

Pause the machine and inspect the grade. Reposition the excavator if necessary. Reduce joystick travel and slow the pass. Uneven travel speed often creates waves.

Should I test the controls before moving soil?

Yes. Perform a slow test in an open area. Confirm hydraulic response, alarms, mirrors, and track position. Keep both hands relaxed. My first setup is not always perfect, so I reset when needed.

Conclusion

How to control a mini excavator joystick for smooth grading begins with understanding how each joystick movement affects the boom, arm, bucket, and machine stability. Before starting, inspect the work area, confirm the desired grade, position the excavator on firm and level ground, and adjust the controls for comfortable operation. Smooth grading depends on coordinated joystick movements rather than sudden inputs, allowing the operator to raise, lower, curl, and extend the attachment in a controlled sequence.

Maintain a consistent bucket angle and cutting depth by using small, steady adjustments while monitoring the ground surface. Avoid forcing the bucket too deeply, as this can create uneven cuts and reduce machine stability. Work in overlapping passes, regularly checking the grade with a suitable measuring method or visual reference. If high or low areas remain, refine them gradually with light finishing passes until the surface is even, accurate, and properly shaped.

Isabella

Isabella

Isabella is a dedicated marketing professional with a sharp focus on driving brand growth and engagement through strategic content creation. With an extensive background in digital marketing, she combines her passion for storytelling with her keen understanding of industry trends to deliver......