How to Grease a Mini Excavator Swing Gear 2026 Top Guide?

Time:2026-09-18 Author:Isabella
0%

Mini excavators work in tight, demanding spaces where dust, water, and shock loads quickly challenge the swing system. Industry reports from Off-Highway Research and KHL’s Yellow Table show continued global demand for compact construction equipment. More machines mean more operators need dependable maintenance knowledge. Yet lubrication is often treated as a quick daily task.

This guide explains how to grease the swing gear of a mini excavator with practical, workshop-focused steps. It covers grease selection, safety preparation, access points, application quantity, and inspection clues. Manufacturer service manuals remain the primary authority because grease ports and intervals differ between brands. Caterpillar, Kubota, Komatsu, and JCB maintenance literature all stress correct lubricant grades and scheduled servicing. The NLGI GC-LB classification and ISO 6743-9 can also help identify suitable grease performance requirements.

Small details matter.

A clean grease fitting prevents abrasive particles from entering the bearing area. A visible bead of fresh grease may confirm distribution, but it does not prove complete coverage. Experienced technicians often rotate the upper structure slowly during servicing, following the manufacturer’s procedure. Over-greasing can also create heat, pressure, and seal problems. That point deserves more attention than it usually receives. This guide therefore avoids universal claims and encourages readers to verify the operator’s manual, machine serial number, and operating conditions. Muddy excavation, frequent slewing, and long idle periods may require different inspection habits. One imperfect assumption can become an expensive repair. Reliable lubrication begins with patience, accurate identification, and a careful look at what the machine is actually showing.
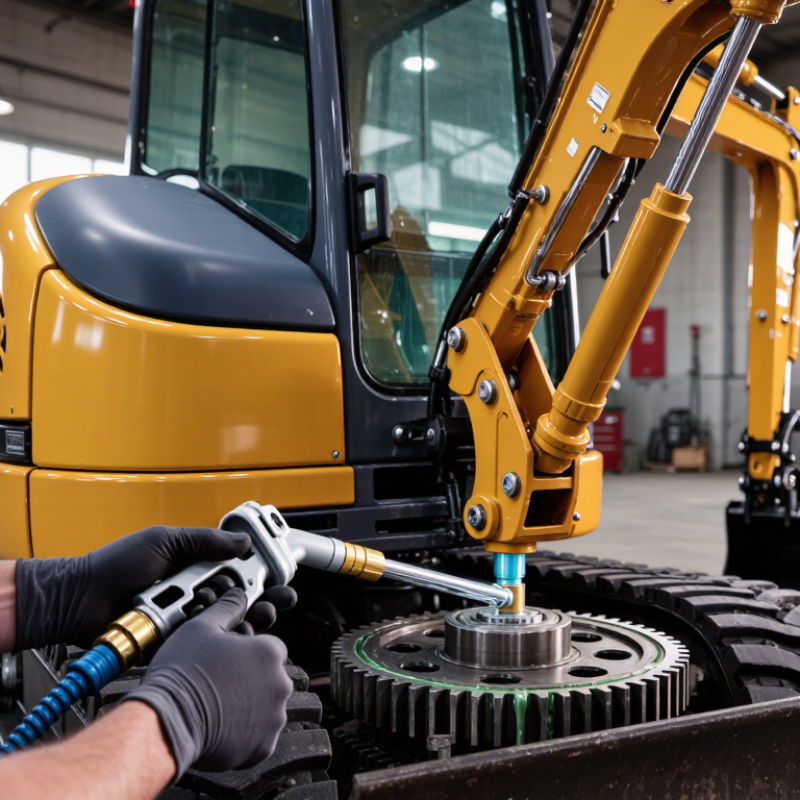
How to Grease a Mini Excavator Swing Gear 2026 Top Guide?

Mini Excavator Swing Gear: Purpose, Location, and Grease Requirements

How to Grease a Mini Excavator Swing Gear 2026 Top Guide?

The mini excavator swing gear transfers hydraulic motor power to the upper structure. It allows the house, boom, and counterweight to rotate smoothly around the undercarriage. The gear usually sits beneath the swing bearing, inside the upper frame. Look for a circular ring gear and a smaller drive pinion near the swing motor. Do not confuse swing gear grease with swing bearing grease. They may require different products and service points.

Use only the grease type and quantity listed in the machine’s service manual. Many open swing gears need a tacky, extreme-pressure grease that stays on moving teeth. Apply a thin, even coating through the inspection opening. Rotate the upper structure slowly, then inspect the complete ring. Excess grease can attract sand, while too little grease causes polished teeth, heat, and abnormal noise. A clean tooth is not always a healthy tooth. Check for pitting, sharp edges, loose fasteners, or uneven contact patterns. These details are easy to miss.

Tips: Clean the cover area before opening it. Keep dirt away from the gear. Grease after washing only when the parts are dry. Record the service date and operating hours. Stop if metal flakes appear in the grease. Recheck the area after several work cycles, because the first application may spread unevenly. When uncertain, verify the manual instead of guessing.

Tools, Safety Measures, and Preparation Before Lubrication

Before greasing a mini excavator swing gear, prepare the machine and work area carefully. I use the service manual to confirm the correct grease type, grease quantity, and lubrication points. The required tools usually include a compatible grease gun, clean grease, lint-free rags, a small brush, and a flashlight. Keep spare gloves nearby. Dirty gloves can contaminate fittings.

Park on firm, level ground and lower the attachment completely. Stop the engine, remove the key, and follow the machine’s isolation procedure. Release stored hydraulic pressure before reaching near moving parts. Wear safety glasses, protective gloves, and sturdy footwear. The swing area can contain pinch points. Keep other people outside the working zone. A warning sign helps, but it cannot replace direct communication.

Clean each grease fitting before attaching the gun. Even a thin layer of sand can enter the bearing and cause premature wear. Check for damaged fittings, loose covers, cracked seals, or unusual metal dust. I once rushed this inspection and found old grease hiding a damaged nipple. That mistake changed my routine. I now rotate the upper structure slowly, only when the manual permits it, to access each point safely. Do not grease the swing gear teeth unless the manufacturer specifically requires it. Too much grease can also attract grit and create pressure around seals. Stop if resistance feels abnormal, because forcing the gun may damage the fitting.

How to Access and Grease the Swing Gear Step by Step

How to Grease a Mini Excavator Swing Gear: 2026 Top Guide

How to access the swing gear depends on the machine’s design. Park on firm, level ground, lower the attachment, and stop the engine. Remove the key before opening any cover. Clean dirt around the inspection panel and grease fittings with a brush. Some models place the swing gear below the upper frame, while others use an access plug or service opening. Check the operator’s manual before removing bolts.

Apply the specified grease slowly through the fitting. Stop when fresh grease appears, or when the manual gives a measured amount. Do not force grease against a blocked fitting. Excess pressure can damage seals. If the gear teeth are visible, spread a thin layer across the contact area using a suitable tool. Keep your hands away from pinch points. Reinstall every cover before testing the swing function.

Tips: Grease after cleaning, not before. Inspect for metal flakes, water, or uneven tooth wear. A small flashlight helps reveal dry sections. Rotate the upper structure only from the operator’s seat, with people and obstacles far away. I still recheck the cover bolts afterward; one loose bolt can create confusing noise. Never guess the grease type or service interval. Configuration differences matter.

How to Grease a Mini Excavator Swing Gear 2026 Top Guide? - How to Access and Grease the Swing Gear Step by Step
Step Access Area Required Condition or Tool Action Grease Guidance Completion Check
1 Work area and machine position Level, firm ground; attachment lowered; engine stopped; hydraulic pressure released Park the excavator safely, engage the parking system, remove the key, and follow the operator’s safety procedure. Do not grease while the upper structure is moving or while a person is inside the swing area. The machine cannot move unintentionally and the swing radius is clear.
2 Swing gear cover or inspection opening Socket set, clean rag, work light, and the machine service manual Locate the swing gear access cover, removable inspection plate, or grease fitting. Remove only the access components specified for the machine. Access arrangements vary by model; never remove structural or sealed components unnecessarily. The grease point or gear teeth are visible without exposing unrelated hydraulic or electrical parts.
3 Grease fitting and surrounding surface Lint-free cloth and suitable cleaning brush Clean dirt, sand, and old hardened grease from the fitting and nearby surfaces before connecting the grease gun. Contamination can damage the swing bearing or gear mesh; keep the grease nozzle clean. The fitting is clean, undamaged, and securely attached to the grease gun coupler.
4 Swing gear teeth or grease reservoir Grease approved in the operator’s manual; commonly an EP multipurpose grease with an NLGI grade specified by the manufacturer Apply a clean, even coating to the exposed gear teeth or pump grease through the designated fitting. Do not mix incompatible grease types. Use the specified grease type and quantity. Avoid filling the housing completely unless the manual requires it. Gear teeth have continuous coverage, with no large dry areas or excessive piles of grease.
5 Full swing circumference Upper structure moved only according to the safety procedure; an assistant may be used outside the danger zone If the design requires repositioning, stop greasing, secure the machine, rotate the upper structure to a new section, and repeat the access and application process. Some swing gears require several access positions to distribute grease around the complete ring. The entire accessible circumference has been inspected and lubricated evenly.
6 Swing bearing and gear interface Visual inspection; no dismantling required Check for abnormal metal particles, water contamination, damaged teeth, loose fasteners, or grease leakage. Metal flakes, strong burnt odor, or repeated grease loss may indicate a mechanical fault rather than a lubrication shortage. No unusual damage is visible. Stop operation and arrange inspection if serious wear is found.
7 Access cover and fittings Correct fasteners, clean cloth, and replacement seals if specified Wipe away excess grease, inspect the seal, reinstall the cover, and tighten fasteners to the manual’s torque requirement. Do not leave grease on walkways, pedals, controls, brakes, or other surfaces that require traction. The cover is secure, the fitting cap is installed, and no access panel is loose.
8 Functional test Operator seated correctly; area clear; low-speed operation only Start the machine according to normal procedure and operate the swing slowly through a controlled range. Avoid high-speed swinging immediately after service if excess grease may still be displaced. Swing movement is smooth, with no abnormal noise, binding, vibration, or visible grease leakage.
9 Maintenance record Service log or digital maintenance record Record the operating hours, date, grease type, approximate quantity, access points serviced, and inspection findings. Follow the service interval in the machine manual. Dust, mud, water, and frequent operation may require more frequent lubrication. The next lubrication due point is clearly identified.
Important: Swing gear access, grease location, lubricant specification, quantity, and service interval differ between mini excavator models. Always give priority to the machine’s current operator and maintenance manual.

How to Check Grease Coverage and Reassemble the Excavator

Before greasing a mini excavator swing gear, park on firm ground, lower the attachment, shut down the engine, and release hydraulic pressure. Clean the inspection area with a lint-free cloth. Dirt near the cover can enter the gearcase quickly. Industry lubrication reports often attribute up to 80% of lubricant-related failures to contamination, so cleanliness is not cosmetic.

Apply the specified grease through the service port, then rotate the upper structure slowly in short movements. Watch the exposed gear teeth through the inspection opening. Proper coverage should leave a thin, continuous film across the tooth faces, pinion contact area, and ring gear track. Dry bright patches indicate poor distribution. Large lumps suggest overgreasing. Do not trust one viewing angle. Check several positions around the swing circle. A phone photograph can help compare coverage later, though glare may mislead you.

Remove the cover only after marking its original position. Inspect the gasket, bolts, gear teeth, and metal particles in the old grease. Minor paste-like residue may be normal; sharp chips or repeated flakes require professional assessment. Refit the cover with a sound gasket, align the marks, and tighten bolts in a diagonal pattern. Use the excavator’s service manual for torque values. ISO 55001 maintenance guidance supports recording inspection results, grease type, and operating hours. I still recheck the seal after the first work cycle. Small leaks are easy to miss. A perfect-looking repair can fail from one loose fastener.

Common Greasing Mistakes, Service Intervals, and Maintenance Tips

How to Grease a Mini Excavator Swing Gear 2026 Top Guide

Greasing a mini excavator swing gear requires more than adding lubricant until it feels full. Check the service manual first, because swing bearing grease and swing gearbox oil are different products. Park on firm ground, lower the attachment, stop the engine, and clean the grease fitting. Dirt around the nozzle can enter the bearing. Pump slowly until a small amount of fresh grease appears, then wipe away the excess. Do not force grease into a blocked fitting.

Many machines require swing bearing service about every 50 operating hours, but dusty, wet, or high-load work may shorten that interval. Follow the equipment schedule instead of guessing. Record the date, operating hours, grease type, and fitting condition. This simple log often reveals missed maintenance. Swing gear teeth should not be greased unless the manual specifically requires it. Extra lubricant can collect abrasive soil and damage the gear mesh.

Common mistakes include using mixed grease, pumping too much, and ignoring unusual resistance. I once assumed a stiff fitting needed more pressure. It actually needed cleaning and inspection. That mistake is worth remembering. A damaged seal, loose bearing, grinding sound, or uneven swing deserves professional inspection. During routine checks, look for metal particles, leaking lubricant, cracked guards, and unusual play. Use clean tools, keep containers closed, and avoid rotating the upper structure while anyone stands nearby. Small details matter.

FAQS

What does a mini excavator swing gear do?

It transfers hydraulic motor power to the upper structure. The house, boom, and counterweight rotate around the undercarriage.

Where is the swing gear located?

It usually sits beneath the swing bearing, inside the upper frame. Look for a ring gear and a smaller pinion near the swing motor.

Is swing gear grease the same as swing bearing grease?

Not always. These parts may have different grease types and service points, so check the service manual carefully.

What grease should be used on an open swing gear?

Use only the specified grease. Many open gears require tacky, extreme-pressure grease that stays on moving teeth.

How much grease should be applied?

Apply a thin, even coating through the inspection opening. Excess grease attracts sand, while insufficient grease causes heat and tooth wear.

How can the gear be inspected during lubrication?

Rotate the upper structure slowly when permitted. Check the complete ring for pitting, sharp edges, loose fasteners, and uneven contact.

What safety steps are needed before lubrication?

Park on firm, level ground. Lower the attachment, stop the engine, remove the key, and release stored hydraulic pressure.

What tools are useful for this service?

Prepare a compatible grease gun, clean grease, lint-free rags, a small brush, and a flashlight. Keep spare gloves nearby.

Should the swing gear teeth always be greased?

No. Grease the teeth only when the manual specifically requires it. Some lubrication points may belong to the swing bearing instead.

What signs mean lubrication should stop?

Stop if metal flakes, abnormal resistance, damaged fittings, cracked seals, or unusual metal dust appear. Do not force the grease gun.

How often should the area be checked afterward?

Recheck it after several work cycles. The first application may spread unevenly, and small problems can hide under old grease.

What mistake can happen during this maintenance?

Rushing can hide a damaged grease fitting beneath dirty grease. I made that mistake once, and it changed my inspection routine.

Conclusion

This guide explains how to grease the swing gear of a mini excavator safely, effectively, and with minimal downtime. It introduces the swing gear’s purpose, typical location, and lubrication requirements, then covers the tools, protective equipment, and preparation needed before starting. Readers will learn how to secure the excavator, access the swing gear compartment, apply the correct amount of suitable grease, and distribute it evenly across the gear and bearing area.

The guide also describes how to inspect grease coverage, identify dry or contaminated areas, and reassemble protective components correctly. It highlights common mistakes, such as over-greasing, using incompatible lubricant, skipping cleaning, or ignoring unusual noise and movement. Finally, it explains how to establish practical service intervals based on operating conditions and provides maintenance tips to help reduce wear, protect critical components, and support smooth, reliable excavator operation.

Isabella

Isabella

Isabella is a dedicated marketing professional with a sharp focus on driving brand growth and engagement through strategic content creation. With an extensive background in digital marketing, she combines her passion for storytelling with her keen understanding of industry trends to deliver......